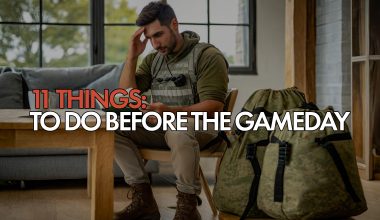
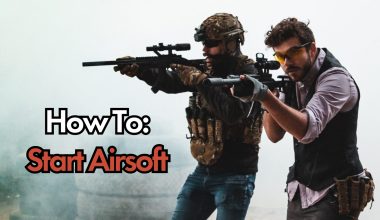
Maneuvring, Speed, and Precision. These are the 3 main things you want to focus on with any gun drills. Today, we will show you which Pistol Drills you can practice at home and improve at all of these. And we throw in a little extra.
💡 Train with a purpose! Have a goal you would like to achieve – one that will help you play. Be it accuracy or how fast can you draw and fire.
What you’ll need?
- Safe space where you can fire your airsoft replicas.
- Safe backstop to catch your BBs.
- Holster for your replica.
- Pistol Replica.
- Mag pouch.
- Targets.
- Phone.
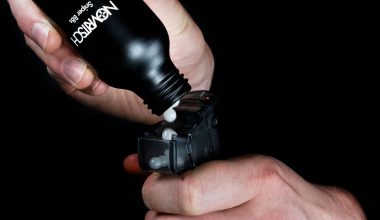
- Gas and BBs.
Drill 1: Tactical Reloads
Will help you improve: Reload speed, muscle memory
Train for: 30 min
If you do not have 2 magazines, you can remove the magazine, holster it, and then put it back into the gun.
- Start by aiming at your target.
- Fire one BB at the target.
- Finger off the trigger.
- With your support hand, grab the new magazine from the magazine pouch, hold it between your middle and index finger, and simultaneously tilt your gun with the magwell pointed at your magazine pouch.
- While still holding the fresh magazine, release the old magazine between your thumb and index finger and replace it with the new magazine.
- Holster the empty mag.
- Reestablish your grip.
- Aim again and fire one more round.
- Repeat.
⏱️ Slow is smooth, smooth is fast. Don’t try to rush it, focus on muscle memory.
There are more variations of this drill. You can either re-insert the spent magazine back into your pouch or use the dump pouch. With airsoft gas pistols, be careful if you throw empty magazines on the ground. A hard hit on concrete can lead to gas leaks.
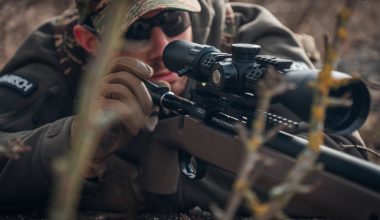
Drill 2: Draw
Will help you improve: Gun manipulation
Train for: 20 min
A precise shot from the draw starts with a good grip on your pistol. In order to train for it, first divide the whole movement into individual sections and only then connect them. Don’t focus on the time when you warm up so you don’t pick up mistakes just to push your speed.
Grip
- Stand relaxed and idle.
- Get into your shooting stance and put your hand firmly on the grip. Make sure your hand is as high up on the grip as possible. Keep your trigger finger straight and off the trigger position it on the frame, not on the trigger guard.
- Get back to your natural stance.
Draw
- Start from your shooting stance with your hand on the grip.
- Draw the pistol from the holster.
- If you have a safety, disengage it.
- Aim at your target.
- Pull the trigger until you feel the wall of your trigger.
- Fire a single well-aimed shot.
- Safety on and holster.
- Repeat multiple times.
From neutral to fire
- Stand relaxed and idle.
- Get into your shooting stance and put your hand firmly on the grip.
- Draw the pistol from the holster.
- If you have a safety, disengage it.
- Aim at your target.
- Pull the trigger without moving the muzzle.
- Safety on and holster.
Drill 3: Emergency reload
Will help you improve: muscle memory, gun handling
Train for: 15 min
As the name suggests, you will utilize this drill in an emergency, a.k.a. when your pistol runs out of BBs while you fight. If you fear you can damage your magazine when you drop it on a hard surface, create a drop box from an old cardboard box and some cushioning like pillows.
Setup
- BB in the chamber and an empty magazine in your pistol.
- Full magazine in your magazine pouch.
- Start either aiming at your target or in your holster.
- Use a drop box to prevent damaging your magazines.
Execution
- Draw your pistol.
- Aim at the target and fire. The slide will lock in the rear.
- Break your grip to release the magazine that is in the gun.
- Simultaneously, reach for your fresh magazine.
- Insert the fresh magazine into your pistol & release your slide by pressing the slide release on the side of your pistol.
- Re-establish your two-hand grip.
- Fire one more BB.
- Reset the drill by tac reloading your pistol.
Drill 4: Dot torture
Will help you improve: Shooting accuracy & gun manipulation
Train for: 25 min
Josef’s favorite, The “Dot Torture” drill, is a popular drill designed to improve accuracy, trigger control, and the fundamentals of marksmanship. It’s a challenging yet effective drill that can be adapted to various skill levels. The standard Dot Torture drill consists of 50 shots at a target with 10 Dots. Each dot has a specific shooting requirement. The goal is to hit each dot with the required number of shots, ideally without missing, to improve precision and control.
Target Setup
- Use a Dot Torture target, which you can find and print. The target consists of ten numbered dots, each about 2 inches in diameter.
- You can download the Dot Torture Target for free.
- Place the target at a distance of 3 yards / 3 meters to start. As you improve, you can increase the distance to make the drill more challenging.
Drill Breakdown
- Dot 1: Draw and fire 5 shots with one hand (strong hand only).
- Dot 2: Draw and fire 5 shots with the other hand (support hand only).
- Dot 3: Draw and fire 5 shots using both hands. For this and all subsequent two-handed shots, ensure proper grip and stance.
- Dot 4: Draw, fire 1 shot, holster, and repeat 4 more times for a total of 5 shots. This dot focuses on practicing the draw and first-shot accuracy.
- Dot 5: Draw and fire 5 shots, with a focus on slow, precise shots to ensure accuracy.
- Dot 6: Draw and fire 1 shot at Dot 6, then 1 shot at Dot 7, and holster. Repeat this sequence 4 times for a total of 8 shots (4 on each dot). This part of the drill practices transitioning between targets.
- Dot 7: (Covered in Dot 6’s instructions).
- Dot 8: Draw and fire 2 shots at Dot 8, perform a magazine change, and then fire 2 more shots at Dot 8. This dot focuses on reloads under pressure.
- Dot 9: Draw and fire 1 shot at Dot 9, then 1 shot at Dot 10, and holster. Repeat the sequence, but start with Dot 10 and then shoot Dot 9. Continue alternating for a total of 8 shots (4 on each dot). These drills target transitions and decision-making under pressure.
- Dot 10: (Covered in Dot 9’s instructions).
Tips for Success
- Pace: Don’t rush. The primary goal is accuracy, not speed. As you become more accurate, you can work on increasing your speed gradually.
- Focus on Fundamentals: Pay close attention to your grip, stance, sight alignment, and trigger control with each shot.
- Record Your Progress: Keep track of your scores to monitor improvements over time. Note which parts of the drill you find most challenging and focus on those areas.
The Dot Torture drill is adaptable, and you can modify it as you see fit. However, the core focus remains on mastering the fundamentals and becoming a more proficient and accurate shooter.
Action Air IPSC Home Range
To create a detailed at-home Action Air IPSC range, follow these steps:
- Select Your Targets: Our reusable target poppers for durability and instant feedback. These targets mimic the feel of a competitive range better than paper targets, and you don’t have to replace them like paper targets.
- Positioning Targets: Place your targets at different distances and angles across your designated shooting area. This variability helps in practicing for the unpredictable layouts of IPSC courses. Include both close-range targets for quick reflex shots and farther ones to test your accuracy.
- Incorporate Obstacles: Use objects like barrels, boxes, or makeshift barricades to create obstacles. These elements encourage movement and strategic cover usage, adding realism to your training.
- Timing Your Drills: Use a method to time your drills accurately. A simple stopwatch can work, but for a more integrated experience, consider using a shooting timer app or our Bluetooth target, which can offer detailed feedback on your performance.
- Layout Design: Design your course layout to include a mix of shooting scenarios, such as rapid-fire targets, precision shots, and transitions between different positions. The goal is to simulate the variety and challenge of an IPSC competition.
By carefully setting up your at-home range with these elements, you’ll create a comprehensive training environment that sharpens your skills effectively.
How to create a BB catcher
For a BB catcher, use heavy-duty fabric that’s hung loose. BBs will not penetrate it and will just fall to the floor. Or place your targets inside the BB catcher.
If you live in a flat, cellars could be a good place to practice since there is a lower risk of annoying your neighbors or getting the police called on you because someone saw a guy with a gun through a window.
Introducing the Bluetooth Target
The Novritsch Bluetooth Target, compatible with both iOS and Android, offers advanced real-time performance tracking. This durable target popper connects via Bluetooth, with a range of up to 40 meters, to a smartphone app for immediate feedback on shot impacts and shooting patterns. It features a multi-colored LED light to display its status (standby, start, hit, etc.) For added security, the base has two holes for mounting the target in place, ensuring it stays fixed during use. The free, in-house-developed app allows you to control the target and choose one of the three different game modes:

- IPSC Test: Upon game activation, a buzzer signals the start; hits are recorded, and results are saved.
- Lap Timer: Hits accumulate until the user stops the game. Each recorded hit changes the target’s light color.
- Target Practice: Continuous shooting with the target automatically resetting to ready after 5 sec.
If you want to take your practice to a whole other level, you can incorporate the Bluetooth target into your next practice. It will help you track your progress and improve your shooting while under stress.